Create Restful Web API using .NET 6 and SQLITE with Entity Framework
June 28, 2021 23:40Create Restful Web API using .NET 6 and SQLITE with Entity Framework
Pre-Requisite
The 4 things that we will need before we start:
Once we have downloaded and installed all of the required tool, we need to make sure that the dotnet SDK has been installed successfully, we need to open the terminal and check if the dotnet SDK is installed successfully by checking the dotnet version
Open the terminal type the command below
dotnet --version
Now we need to install the entity framework tool
dotnet tool install --global dotnet-ef
Once thats finish we need to create our application
dotnet new webapi -n TodoApp --no-https
Setup development environment on vscode
Click yes on Required Asset to build and debug :

Add build group on tasks.json
"problemMatcher": "$msCompile",
"group": {"kind": "build","isDefault": true}
Add "uriFormat": "%s/swagger" on serverReadyAction for auto lunch swagger url when run application
"serverReadyAction": {
    "action": "openExternally",
    "pattern": "\\bNow listening on:\\s+(https?://\\S+)",
    "uriFormat": "%s/swagger"
            }
Now lets add the packages that we will nee in order of us to utilise the EntityFramrwork and SQLite
dotnet add package Microsoft.EntityFrameworkCore.Sqlite
dotnet add package Microsoft.EntityFrameworkCore.Tools
Now lets open VS code and check our application and check the source code, lets build the application and see if its running
dotnet build
dotnet run
or you can use shortcut command CTRL + SHIFT + B
Let check the .csproj file and see package was add onto our project
<ItemGroup>
    <PackageReference Include="Microsoft.EntityFrameworkCore.Sqlite" Version="5.0.8" />
    <PackageReference Include="Microsoft.EntityFrameworkCore.Tools" Version="5.0.8">
      <IncludeAssets>runtime; build; native; contentfiles; analyzers; buildtransitive</IncludeAssets>
      <PrivateAssets>all</PrivateAssets>
    </PackageReference>
    <PackageReference Include="Swashbuckle.AspNetCore" Version="5.6.3" />
  </ItemGroup>
We start by removing the default template code that was generated by the .Net core framework for us. Will delete the WeatherForecastController and the WeatherForcast class.
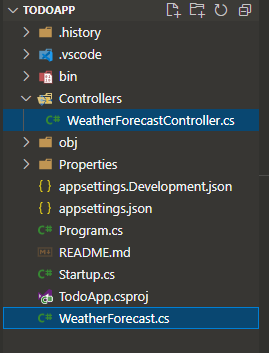
Will create our own controller will call it TodoController.
Will create our first simple action will call it TestRun, lets start coding our controller
using Microsoft.AspNetCore.Mvc;

namespace TodoApp
{
    [Route("api/[controller]")]
    [ApiController]
    public class TodoController : ControllerBase
    {
        [HttpGet]
        public ActionResult TestRun()
        {
            return Ok("success");
        }

    }
}
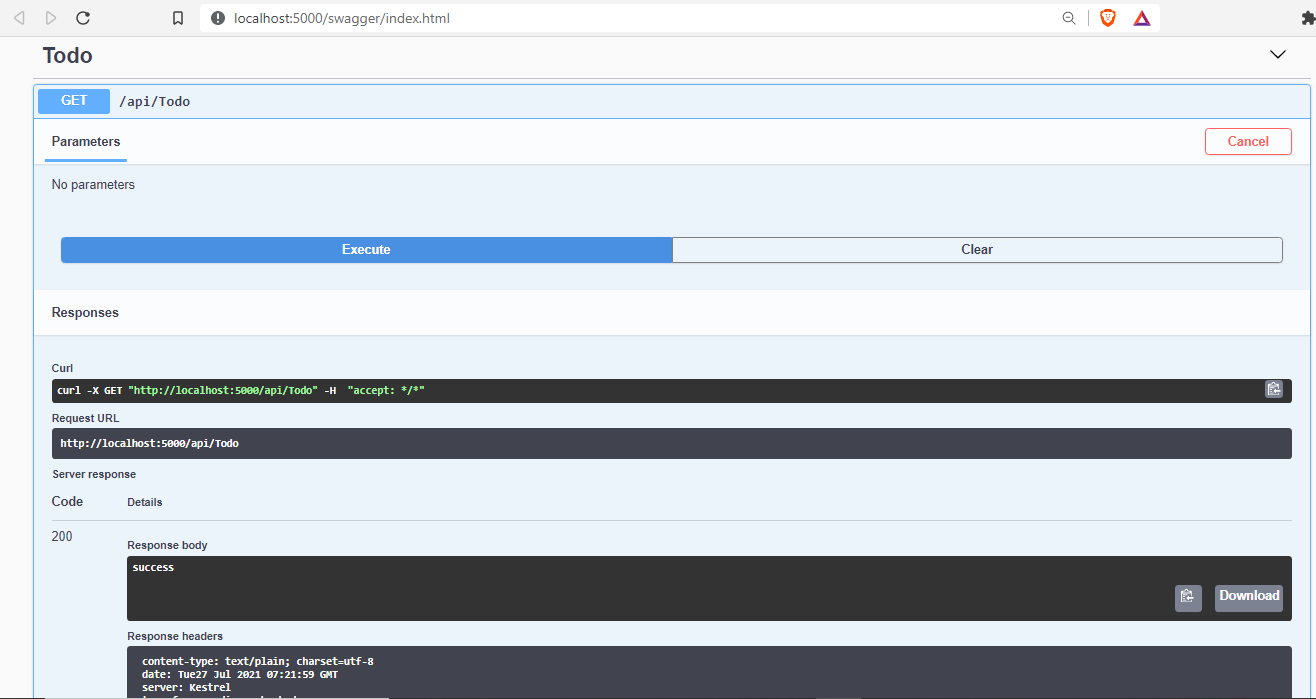
look how our api on swagger ui
Once the application is running we need to try it the api on swagger ui and there see we get the response.
or you can copy this https://localhost:5001/api/todo/ url to browser see what you get the success response
After testing it we now need to start adding models, we add a models folder in the root directory and we add a class inside of it called Item. This is going to be a very simple model which represent our todo list item.
public class ItemData
public class ItemData
{
    public int Id { get; set; }
    public string Title { get; set; }
    public string Details { get; set; }
    public bool Done { get; set; }
}
once we add our model now we need to build our DbContext. We need to create a Data folder in our root directory and inside this folder will create a new class called TodoAppDbContext.
using Microsoft.EntityFrameworkCore;
using TodoApp.Models;

namespace TodoApp.Data
{
    public class TodoAppDbContext : DbContext
    {
        public DbSet<Item> Items { get; set; }

        public TodoAppDbContext(DbContextOptions<TodoAppDbContext> options) : base(options)
        {
        }
    }
}
We need to specify our connection string inside the appsettings.Development.json application
{
  "ConnectionStrings": {
    "DefaultConnection": "DataSource=app.db;Cache=Shared"
  },
  "Logging": {
    "LogLevel": {
      "Default": "Information",
      "Microsoft": "Warning",
      "Microsoft.Hosting.Lifetime": "Information"
    }
  }
}
Perfect once our DbContext and connection string is ready we need to update the startup class so we can utilise the Application DbContext inside our application. Open the startup class in our root folder and add the following code.
public void ConfigureServices(IServiceCollection services)
{
    services.AddDbContext<TodoAppDbContext>(options =>
        options.UseSqlite(Configuration.GetConnectionString("DefaultConnection")));

    services.AddControllers();
    services.AddSwaggerGen(c =>
      {
        c.SwaggerDoc("v1", new OpenApiInfo { Title = "TodoApp", Version = "v1" });
      });
}
Once we have add the DbContext middleware we need to add the initial migration to create the database.
dotnet ef migrations add "Initial Migrations"
dotnet ef database update
After the database update has completed successfully we can see we have a new folder called migrations which will contain the C# script which will be responsible on creating the database and its table Item. we can verify that the database has been created since we can see the app.db file in our root directory as well we can see that use the SQLite browser to verify that the table has been created successfully.
Now that we have completed all of the infrastructure work for our controller. Now we need to start building our TodoController and connect it to the ApiDbContext.
Will start by adding the get all items in our todo list
using System.Linq;
using System.Threading.Tasks;
using Microsoft.AspNetCore.Mvc;
using Microsoft.EntityFrameworkCore;
using TodoApp.Data;
using TodoApp.Models;

namespace TodoApp
{
    [Route("api/[controller]")]
    [ApiController]
    public class TodoController : ControllerBase
    {
        private readonly TodoAppDbContext _context;

        public TodoController(TodoAppDbContext context)
        {
            _context = context;
        }
        [HttpGet]
        public async Task<ActionResult> GetItems()
        {
            var items = await _context.Items.ToListAsync();
            return Ok(items);
        }

        [HttpGet("{id")]
        public async Task<IActionResult> GetItem(int id)
        {
            var item = await _context.Items.FirstOrDefaultAsync(i => i.Id == id);

            if (item is null)
                return NotFound();

            return Ok(item);

        }

        [HttpPost]
        public async Task<ActionResult> CreateItem(Item item)
        {
            if (!ModelState.IsValid)
                return BadRequest();

            await _context.Items.AddAsync(item);
            await _context.SaveChangesAsync();

            return CreatedAtAction(nameof(GetItem), new { item.Id }, item);
        }

        [HttpPut("{id}")]
        public async Task<IActionResult> UpdateItem(int id, Item item)
        {
            if (id != item.Id)
                return BadRequest();

            var existingItem = await _context.Items.FirstOrDefaultAsync(i => i.Id == id);

            if (existingItem is null)
                return NotFound();

            existingItem.Title = item.Title;
            existingItem.Details = item.Details;
            existingItem.Done = item.Done;

            await _context.SaveChangesAsync();

            return NoContent();
        }

        [HttpDelete("{id}")]
        public async Task<IActionResult> DeleteItem(int id)
        {
            var item = await _context.Items.FindAsync(id);
            if (item is null)
                return NotFound();

            _context.Items.Remove(item);
            await _context.SaveChangesAsync();

            return NoContent();
        }
        private bool ItemExists(int id)
        {
            return _context.Items.Any(e => e.Id == id);
        }
    }
}
We can test each one of these in postman.
Finally since we are using .Net 5 when creating webapi project Swagger will be already integrated within our application, in order for us to see the swagger interface we need to go to (http://localhost:5000/swagger/index.html)
Swagger allows you to describe the structure of your APIs so that machines can read them, at no extra work from our side other then defining swagger in older version of .net core swagger will be able to read our API structure and give us a UI that we can use to enhance our dev experience
Thank you for reading this article
Comments are closed.